Translate this Page
Recent images :
- International Harvester M5 halftrack
- Dassault Mystère Mk IVa number 146
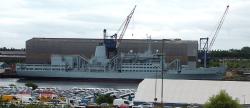
- Ark Royal, Anti-ship missile defence gun.
- RAF Series 2 Land Rover
- Lightweight, air portable Land Rover
- Daimler Ferret Mk 1/2 Armoured Car
- RAF Mountain Rescue Series 3 Land Rover
- French Bronze 6 pounder cannon
- Farsley South African War Memorial
- Farsley War memorial
Images of the Anglo-Boer War(s)
A collection of images relating to the wars fought in South Africa during the late 19th and early 20th Century between the British and Colonial troops, and the Afrikaaner Boer settlers of the Orange Free State and the Transvaal Republic.
Click on the entry for a larger image and details, or click to go back to the previous index

Another image from Underwood and Underwood (from a stereoview) clearly showing the uniforms and equipment in use by the British troops during the Anglo-Boer War. It is entitled "Her Majesty's Heroes marching into Colesberg, S.A. after the Boers retre...
South Africa 1901
A member of the Heilbron Commando Boer re-enactment group with Mauser and bandoliers.
History at Murton 3 - Murton Park, York, England. April 2009
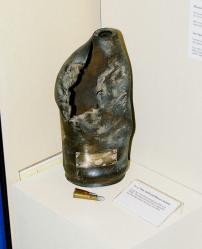
A 94 pound shell from one of the Boer 'Long Tom' Creusot artillery pieces fired into the town of Ladysmith during it's seige. It presumably failed to explode. Also shown are a couple of rounds of Boer ammunition. The Manchesters Regiment were besiege...
The Museum of Manchester's Regiment, Ashton-under-Lyne, UK. March 2004
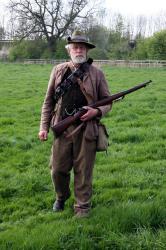
A member of the Heilbron Commando depicting a Boer fighter standing guard over the camp.
He is shown carrying the Mauser rifle and bandolier typical of the time.
History at Murton - Murton Park, York, England. April 2008
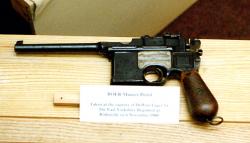
A Boer Mauser pistol taken by the East Yorkshire Rgt after Bothaville, November 1900
The Regimental Museum of the Royal Dragoon Guards & The Prince of Wales Own Regiment of Yorkshire. 2
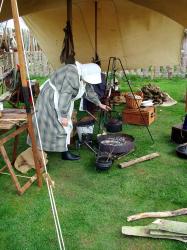
Images of one of the un-sung heroines of the Anglo-Boer War - the steadfast Boer wives who provided for the fighters in the line and who, ultimately, were so poorly treated by the British policy of concentration camps (not to be confused with the lat...
History at Murton - Murton Park, York, England. April 2008
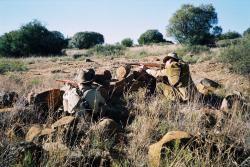
An excellent photograph of two members of the Oranje Vrijstaat Artillerie Corps blending with the veldt. It can readily be imagined how difficult these sharpshooters with smokeless cartridges would have been to target and hit. Their rifles appear to ...
South Africa, Jan 2005
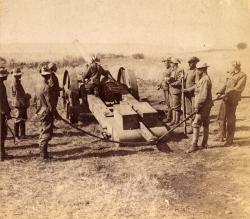
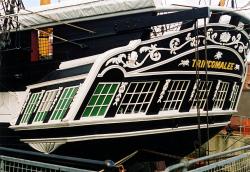
A view of one of the huge, converted Naval pieces used as artillery in the Anglo-Boer war. It is from an Underwood and Underwood stereoview and is entitled "Sighting one of the 4.7 Naval Guns on the Boer Position at Schwartzkop, S.A."
South Africa 1900
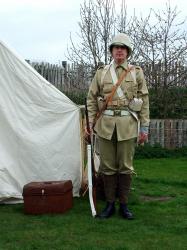
A depiction of the uniform and equipment of the British soldier during the 2nd Anglo-boer war 1899-1902.
Member of the Heilbron Commando re-enactment group
History at Murton - Murton Park, York, England. April 2008

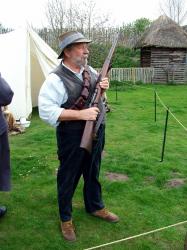
A soldier of the Anglo-Boer war puts his kit on ready for action.
History at Murton 3 - Murton Park, York, England. April 2009
A photograph by Underwood and Underwood entitled "City of London Imperial Volunteers just arrived at the Orange River, South Africa." showing another of the different types of uniform worn by British forces in 1900.
South Africa 1900
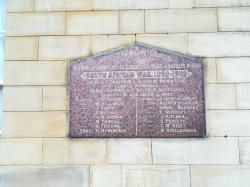
"...Erected by Fellow Villagers" - Lists the names of men of Farsley who died in the South African (2nd Boer) War, 1899 - 1902.
Farsley, West Yorkshire. Nov 2018
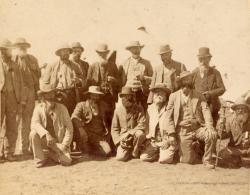
A photograph entitled "Gen. Cronje's principle Commandants - surrendered to Lord Roberts, Feb 27th, S. Africa." showing a group of senior Boers reputedly taken by the British after Paardeberg. Currently I have no names to put to faces - anyone recogn...
South Africa 1900
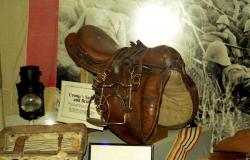
The saddle and bridle of Boer General Piet Cronje, surrendered after the Battle of Paardeberg to the Alexandra, Princess of Wales' Yorkshire Regiment (The Green Howards), Feb 1900.
The Regimental Museum of the Green Howards, Richmond, North Yorkshire. April 2003.
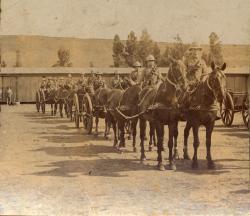
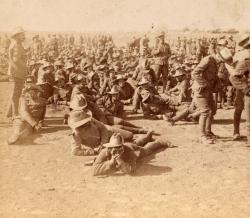
An untitled photograph of a troop of horse artillery from the Anglo-Boer War period. The image clearly shows the late 19th century British khaki uniform.
From an Underwood and Underwood stereoview.
South Africa 1901?
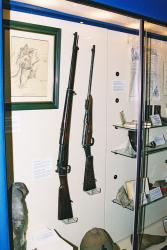
A pair of rifles from the 2nd Anglo-Boer War period. The one on the left is a Mauser rifle used by the Boer forces during the period, produced by Krupps in Germany and shipped to the Transvaal before hostilities broke out. The other is a non-standard...
The Museum of Manchester's Regiment, Ashton-under-Lyne, UK. March 2004
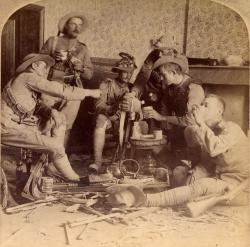
An image from Underwood and Underwood entitled "Remington Scouts enjoying lunch in a Boer home wrecked by Kaffirs, Yaasfontein, S.A." and gives a good impression of this renouned and somewhat irregular unit of Irregulars. It would be interesting to s...
South Africa 1900
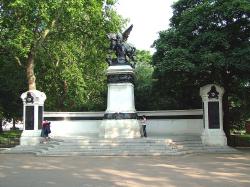
A monument, just off Horse Guards Parade, to the men of the Royal Artillery who fought with great bravery during the 2nd Anglo-Boer War.
London, England. June, 2005

A monument errected after the 2nd Anglo-Boer War 1899-1902 to commemorate the casualties in the various battalia of the Alexandra, Princess of Wales' Own Regiment of Yorkshire, also known as the Green Howards.
By Skeldergate bridge, York, North Yorkshire, England. Summer 2003.

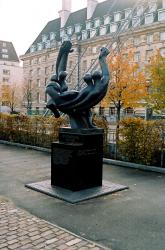
Standing by Admiralty Arch on the Mall, this memorial commemorates the Royal Marines in both the Boer War and the Boxer Rebellion, China 1900. It represents a marine protecting a fallen comrade and accurately depicts the kit and equipment of the per...
The Mall, London. June 2005.
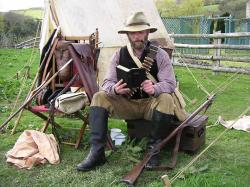
Pictured here is a Transvaal Burgher Force volunteer in the Anglo-Zulu War. wearing the civilian clothes that such a volunteer would have worn as he reads his Bible in High Dutch on a Sunday morning. The rifle is a two-band Snider Enfield and next t...
Buittle Castle event, near Dalbeattie, Scotland. Easter 2004
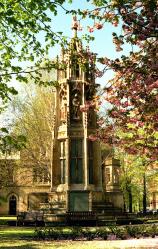
A monument errected after the 2nd Anglo-Boer War 1899-1902 to commemorate those who fell from the County of Yorkshire. It is a particularly fine example with intricate carvings of soldiers, sailors, scouts, artillerymen and nurses who were all involv...
Deangate, outside the Minster's west doors, York, England. Spring 2003.